We often get requests for help in creating social media menus for use inside WordPress’s native menu options.
More often than not, these requests involve the largest social networks like Facebook and Twitter, but also include other social media services and content sharing sites. Below you will find a simple way to create a social media menu inside WordPress using FontAwesome.
Creating a social media menu as explained below, is an easy way to add your own social media links to your own WordPress theme. First off, we need to create a custom nav menu by adding the code below to your functions.php file.
<?php
add_action( 'init', 'social_register_nav_menus' );

function social_register_nav_menus() {
register_nav_menu( 'social', __( 'Social Menu', 'mixamedia' ) );
}
} ?>
Next, you can either create a file called menu-social.php with the following code, or you can copy and paste the code below into your main navigation.
<?php if ( has_nav_menu( 'social' ) ) {
wp_nav_menu( array(
'theme_location'  => 'social',
'container'       => 'div',
'container_id'    => 'menu-social',
'container_class' => 'menu',
'menu_id'         => 'menu-social-items',
'menu_class'      => 'menu-items',
'depth'           => 1,
'fallback_cb'     => '',
)
);
} ?>
We prefer using menu-social.php, so that we can use the following shortcode to call the menu anywhere inside a theme template we want.
<?php get_template_part( 'menu', 'social' ); ?>
Using FontAwesome
Next, you need to install FontAwesome if you don’t use it already, by downloading, following the installation instructions found here.
We like to install FontAwesome inside a /fonts/ folder for ease of use. The code below reflects our own file structure, so you’ll need to change the URL paths if you decide to organize your files differently. You will then need to add the following code to the top of your WordPress theme’s style.css file.
@font-face {
font-family: 'FontAwesome';
src: url('fonts/fontawesome-webfont.eot?v=4.3.0');
src: url('fonts/fontawesome-webfont.eot?#iefix&v=4.3.0') format('embedded-opentype'),
url('fonts/fontawesome-webfont.woff2?v=4.3.0') format('woff2'),
url('fonts/fontawesome-webfont.woff?v=4.3.0') format('woff'),
url('fonts/fontawesome-webfont.ttf?v=4.3.0') format('truetype'),
url('fonts/fontawesome-webfont.svg?v=4.3.0#fontawesomeregular') format('svg');
font-weight: normal;
font-style: normal;
}
Adding CSS
Next we will add a little CSS to style the social media links with their own icons using FontAwesome. You can easily increase your styling options to include other popular sites like Pinterest, WordPress, Tumblr, Flickr, LinkedIn, Instagram, Google+, GitHub, and Dribbble, (Whew!), by adding the CSS using FontAwsome’s Cheatsheet.
#menu-social {
/* Add styling to customize */
}

#menu-social ul {
list-style: none;
margin:     0 0 25px;
text-align: center;
}

#menu-social ul li {
display:  inline-block;
position: relative;
margin: 0 4px;
}

#menu-social li a::before {
content: '\f408';
display: inline-block;
padding: 0 5px;
font-family:'FontAwesome';
font-size:28px;
vertical-align: top;
-webkit-font-smoothing: antialiased;
}

#menu-social  ul li a[href*="facebook"] {
background-color: #3b5a9a;
display: block;
width: 56px;
height: 56px;
-webkit-border-radius: 100%;
-moz-border-radius: 100%;
border-radius: 100%;
font-size: 28px;
line-height: 56px;
outline: 0;
}

#menu-social li a[href*="facebook"]::before {
content: '\f09a';
color:   #fff;
}

#menu-social  ul li a[href*="twitter"] {
background-color: #29a9e1;
display: block;
width: 56px;
height: 56px;
-webkit-border-radius: 100%;
-moz-border-radius: 100%;
border-radius: 100%;
font-size: 28px;
line-height: 56px;
outline: 0;
}

#menu-social li a[href*="twitter"]::before {
content: '\f099';
color:   #fff;
}

#menu-social  ul li a[href*="youtube"] {
background-color: #cb312e;
display: block;
width: 56px;
height: 56px;
-webkit-border-radius: 100%;
-moz-border-radius: 100%;
border-radius: 100%;
font-size: 28px;
line-height: 56px;
outline: 0;
}

#menu-social li a[href*="youtube"]::before {
content: '\f167';
color:   #fff;
}

#menu-social  ul li a[href*="vine"] {
background-color: #18b486;
display: block;
width: 56px;
height: 56px;
-webkit-border-radius: 100%;
-moz-border-radius: 100%;
border-radius: 100%;
font-size: 28px;
line-height: 56px;
outline: 0;
}

#menu-social li a[href*="vine"]::before {
content: '\f1ca';
color:   #fff;
}

#menu-social  ul li a[href*="instagram"] {
background-color: #5280a5;
display: block;
width: 56px;
height: 56px;
-webkit-border-radius: 100%;
-moz-border-radius: 100%;
border-radius: 100%;
font-size: 28px;
line-height: 56px;
outline: 0;
}

#menu-social li a[href*="instagram"]::before {
content: '\f16d';
color:   #fff;
}
Adding Menus
Using the social nav menu is just like using any other nav menu in WordPress. You just need to add custom links pointing to your social media profiles.
Creating a social media menu is now just like adding any other WordPress menu. First you create a new menu under the “Appearance > Menus” screen in the WordPress admin. Simply create a link to the social media profiles you want to display using the full URL including the http://.
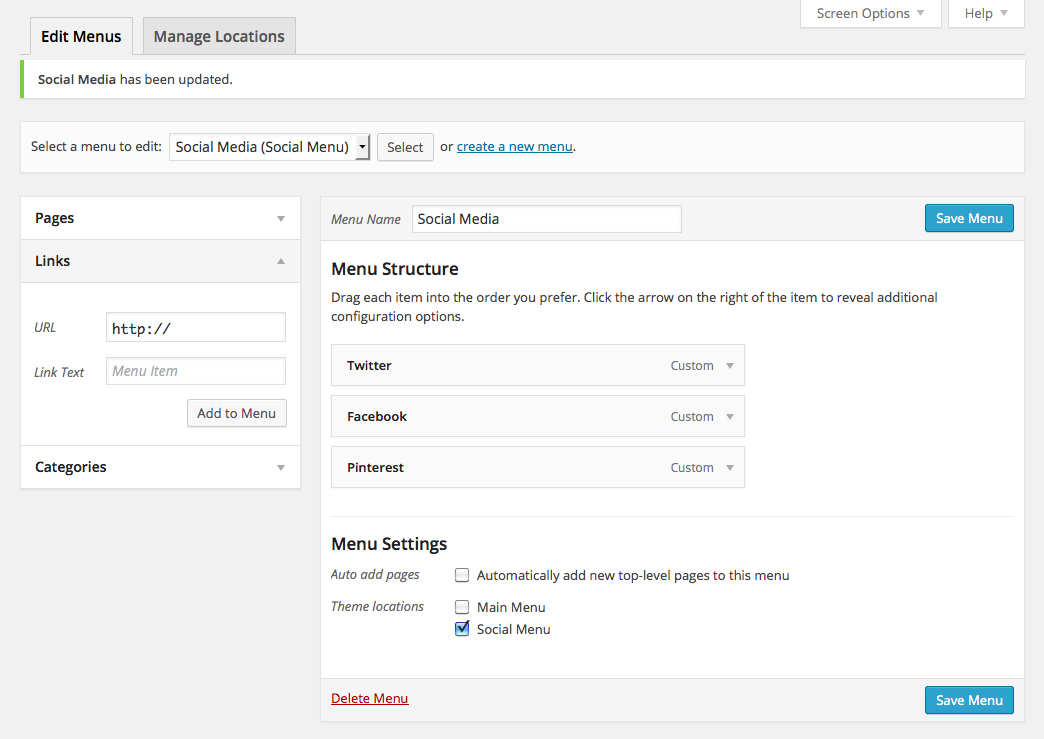
Create a Menu link for each social profile.
Finally you simply select “Social” for the “Theme Location” before saving your menu as shown in the screen image below. That’s it. Now you have a custom social media menu for your own WordPress theme.
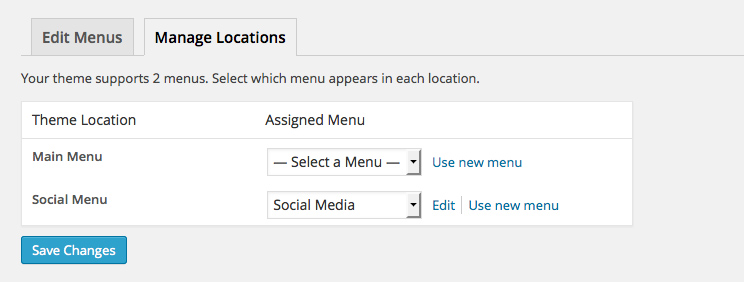
Choose the social media menu as your theme location.
Once you have created and published your page with the menu included, you should see something very similar to the Social Media menu below.
More Resources
- How to Create a Custom Navigation Menu
- Get Started with Font Awesome
- Using Font Awesome in Your WordPress Theme